Black Butterfly Nails: The Minimal Chic Accent Nail Tutorial
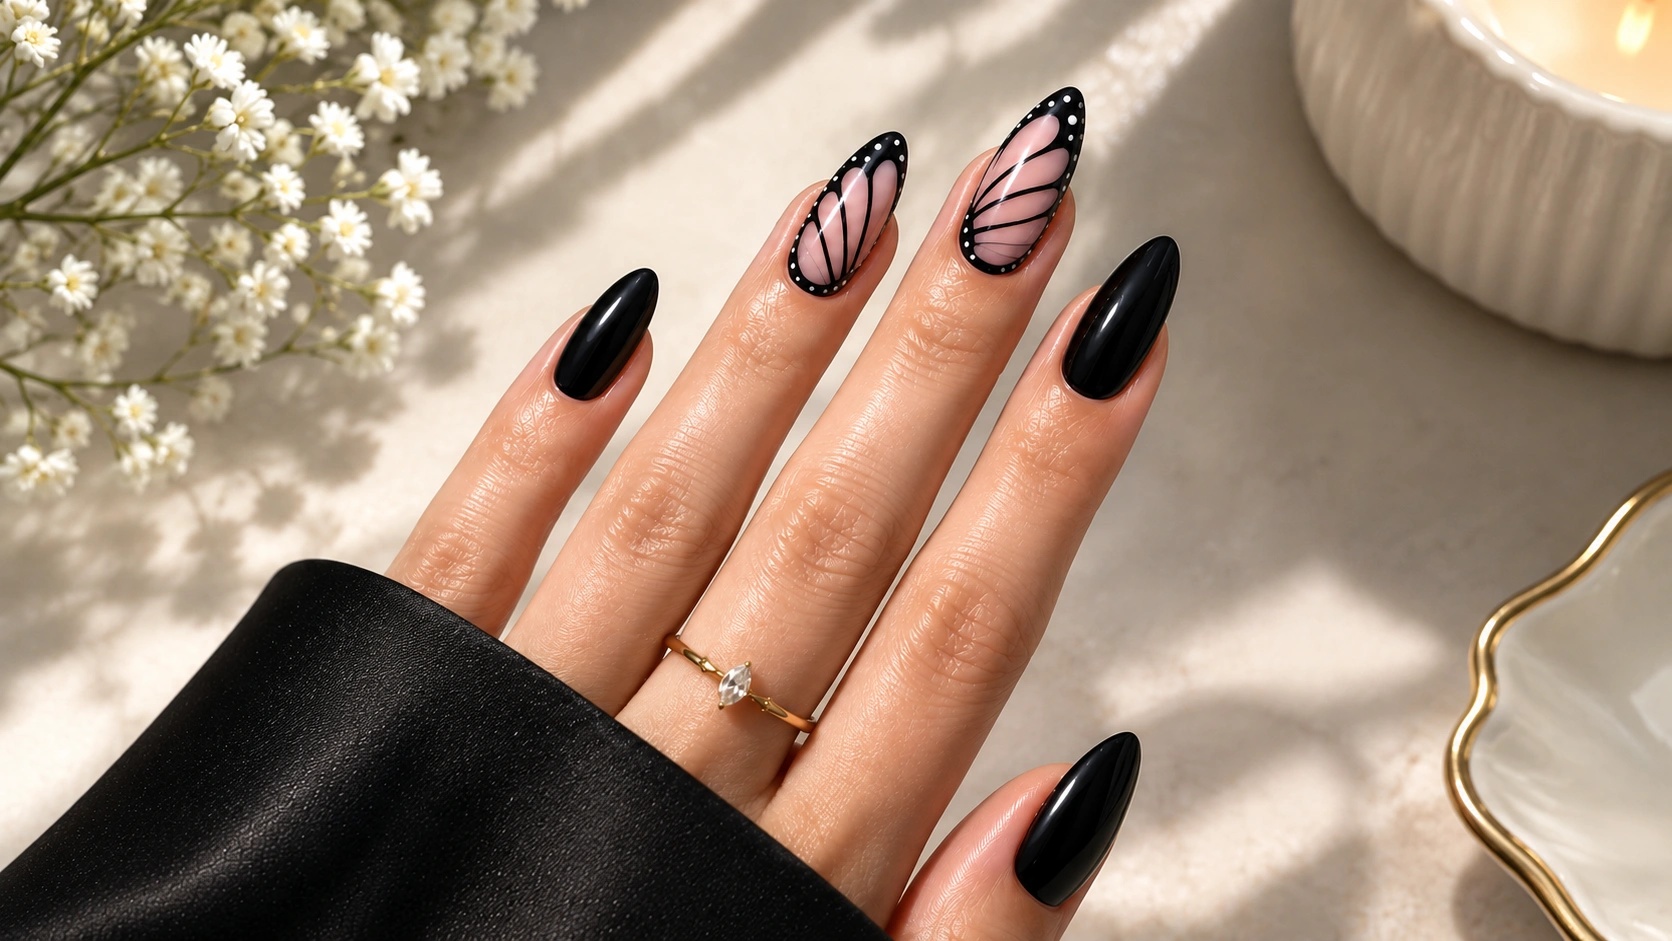
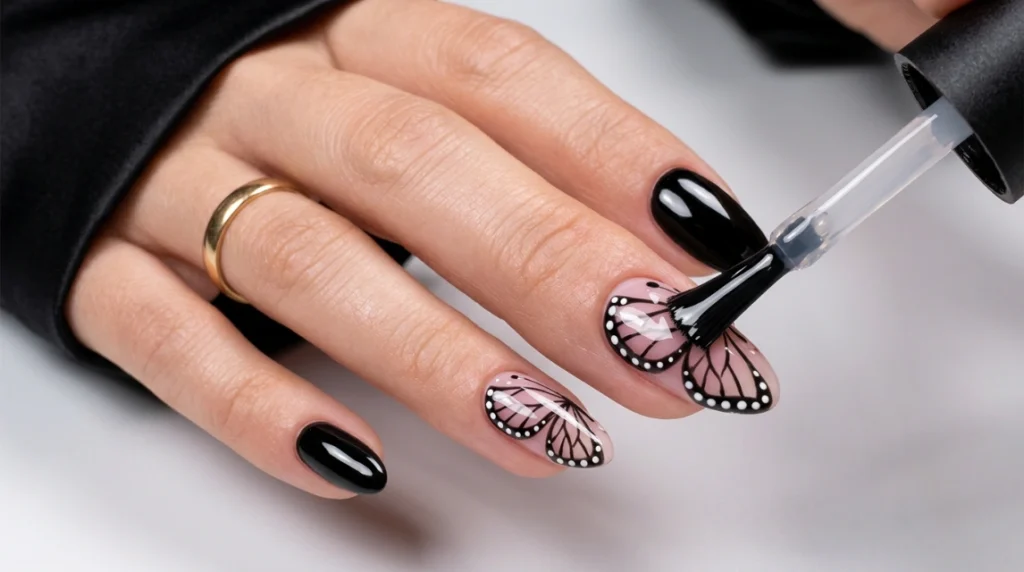
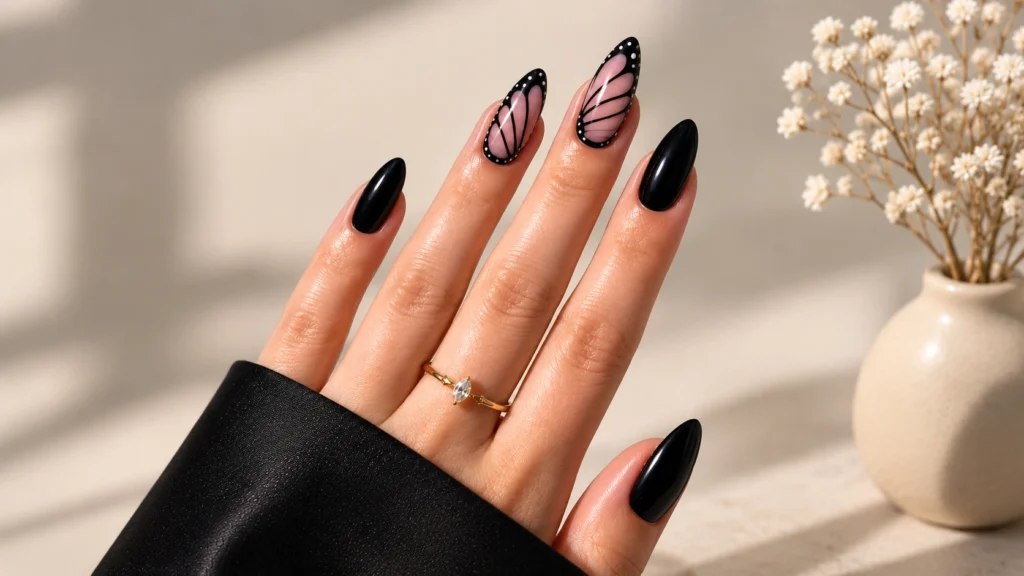
Black butterfly nails strike a balance most nail art struggles to find, delicate and detailed on one hand, bold and graphic on the other. Painted as an accent on just one or two nails against a set of glossy black almond nails, this look reads as genuinely elegant rather than costume-like, the kind of manicure that photographs beautifully in soft, warm light and still looks considered up close.
This guide walks through the complete process for recreating this design at home, a sheer pink wing base, fine black vein linework, and a delicate white dot border, along with the shape and placement reasoning that makes black butterfly nails work as well as they do.
Why This Design Reads as Elegant, Not Costume-y
The single biggest factor separating a sophisticated butterfly accent from something that looks juvenile is restraint, and it’s the first principle worth understanding before picking up a brush. Keeping the butterfly wing pattern to just one or two nails, rather than covering the entire set, is what allows the design to read as a deliberate accent rather than an overwhelming theme. A soft, sheer pink base for the wing shape against solid, glossy black on the surrounding nails creates real visual contrast, translucent and delicate against bold and opaque, which is exactly the pairing that gives this manicure its quiet drama.
Almond and coffin shapes give a wing pattern the most room to develop fully, since the elongated, tapered silhouette mirrors the natural shape of a real butterfly wing far more closely than a short, rounded nail would.
What You’ll Need
- A base coat
- A solid black gel polish for the main nails
- A sheer, pale pink or nude polish for the wing base on your accent nails
- Black gel polish or acrylic paint for the fine wing vein linework
- White polish or acrylic paint for the dotted border
- A fine detail brush or nail art liner
- A dotting tool or the head of a small dotting stylus
- A glossy top coat
Step 1: Apply Your Base Color
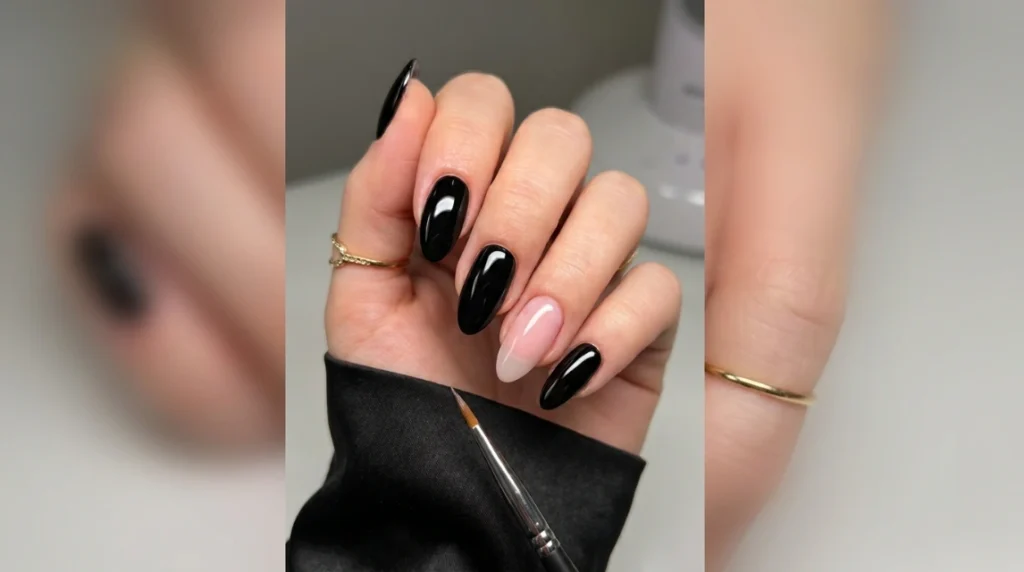
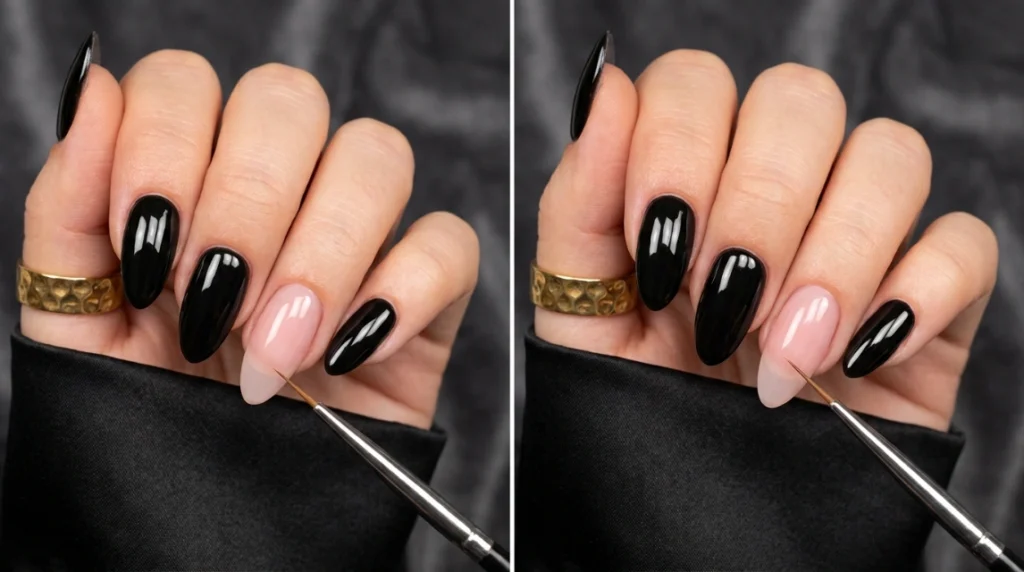
Start with a base coat, then apply and cure two coats of solid black gel polish on every nail except the one or two you’ve chosen as your butterfly accent nails. A glossy finish is essential here, the sharp reflective quality of the black is what makes the sheer, delicate wing pattern on the accent nail stand out so clearly by comparison.
Step 2: Apply the Sheer Pink Wing Base
On your accent nail, or nails, apply a sheer, pale pink or nude polish instead of the black used elsewhere. This translucent base is what your wing pattern will sit on top of, and its softness against the bold black on the rest of the hand is what gives black butterfly nails their signature contrast between delicate and dramatic.
Step 3: Paint the Central Wing Vein
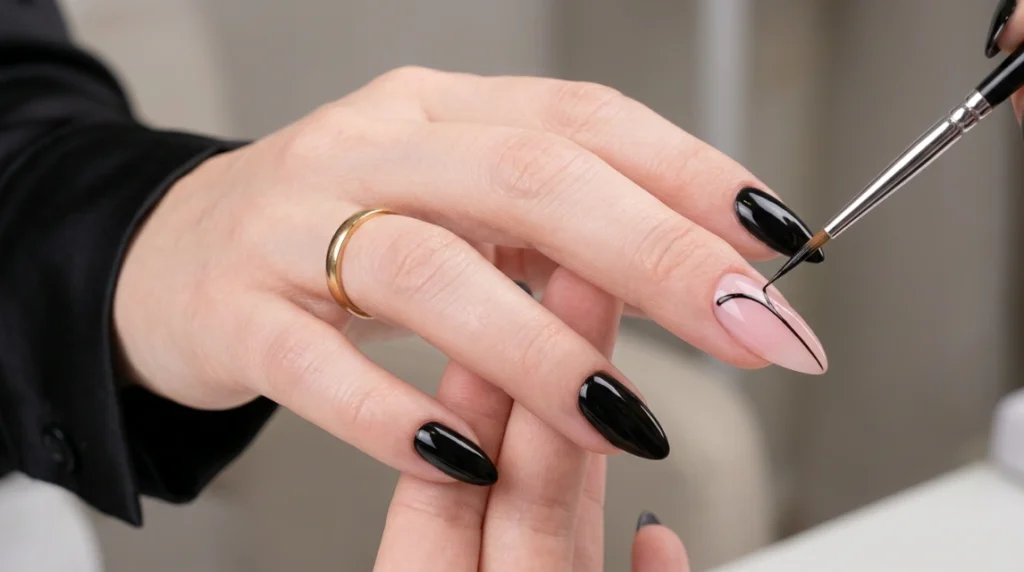
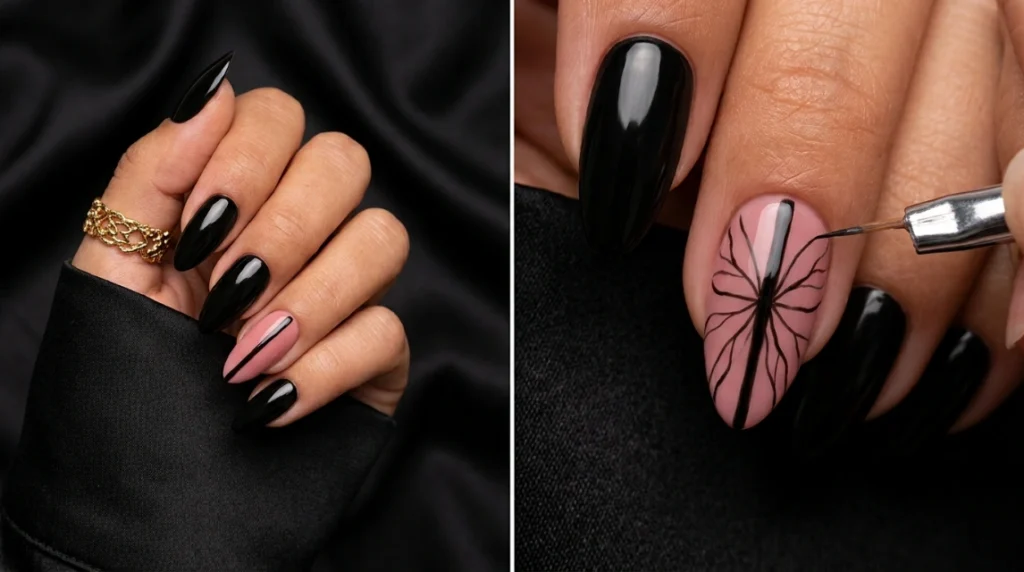
Using a fine detail brush loaded with black polish, paint a single central line running from the base of the nail up toward the tip, this becomes the spine the rest of the wing pattern branches from, mirroring the central vein structure of a real butterfly wing.
Step 4: Build the Wing Vein Branches
From that central line, paint several thinner branching lines fanning outward toward the edges of the nail, curving slightly to follow the natural wing shape. Space the branches unevenly rather than symmetrically, since real wing veining has organic, irregular spacing rather than a perfectly repeating pattern, and that irregularity is what makes the design read as authentic rather than stamped.
Step 5: Add the White Dot Border
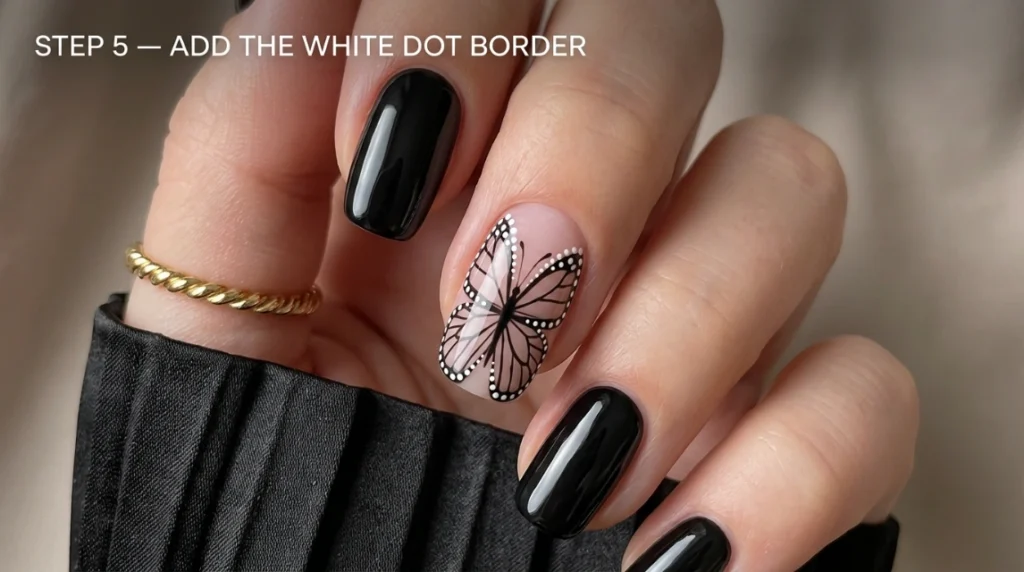
Once your black veining is in place and dry, use a dotting tool or a fine brush loaded with white polish to add a row of small, evenly spaced dots tracing the outer edge of the wing shape. This border is a small detail, but it’s what frames the entire design and gives it a clean, finished silhouette rather than letting the black linework simply fade off at the edges without definition.
Step 6: Cure and Seal With a Glossy Top Coat
Cure the design under a UV or LED lamp if you’re working with gel polish, then finish every nail, both the solid black nails and the butterfly accent, with a high-shine top coat. Gloss is essential for black butterfly nails specifically, since the reflective black base and the light-catching white dot border both depend on shine to read at their most striking.
Where to Place the Accent Nail
Traditionally, the ring finger carries the accent detail, since it draws the eye naturally without disrupting the visual rhythm of the rest of the hand, but there’s no strict rule requiring it. Placing the wing pattern on the middle finger creates a slightly more centered focal point, while using two accent nails, ring and middle, gives the design a touch more presence without tipping into full-set territory. Whichever finger you choose, keeping the remaining nails uniform in the same glossy black is what preserves the accent effect this whole design depends on.
Common Mistakes to Avoid
Covering every nail in the wing pattern. The entire appeal of this design rests on restraint. Butterfly detail on every single nail loses the accent effect entirely and starts to look busy rather than elegant.
Making the wing veins too symmetrical. Real butterfly wings have organic, slightly irregular veining. A too-perfect, evenly spaced pattern can end up looking more like a geometric fan than an actual wing.
Skipping the white dot border. It’s a small step, but it’s what gives the wing shape a clean, defined edge. Without it, the black linework can look unfinished or blurry at the boundary between the wing pattern and the black nails around it.
Using an opaque base instead of a sheer one on the accent nail. The translucent quality of the pink base is a real part of the design’s appeal, not just a color choice. An opaque base flattens that delicate, glass-like quality the sheer version achieves.
Which Nail Shape Suits Black Butterfly Nails Best?
Almond and coffin shapes consistently give a butterfly wing pattern the most natural, proportional canvas to develop across for black butterfly nails, since the tapered, elongated silhouette echoes a real wing’s shape far more closely than a short or rounded nail can. If you’re working with a shorter length, scaling the wing pattern down and keeping the veining simpler, fewer branches, tighter spacing, tends to translate better than trying to compress a full, detailed pattern onto a smaller surface.
How Long Does This Design Last?
Applied over a properly cured gel base and sealed with gel top coat, this design typically holds up as well as any standard gel manicure, roughly two to three weeks before regrowth or wear becomes noticeable. The solid black nails tend to show tip wear a little sooner than the accent nail, since a glossy solid color has less visual texture to disguise small chips, so keeping an eye on those black nails specifically is a useful cue for when a fill or refresh is worth booking.
Quick FAQ
Do I need advanced nail art skills to try this design at home? Not necessarily. The wing veining is meant to look organic and slightly irregular rather than perfectly symmetrical, which actually makes small imperfections read as authentic rather than as mistakes, a genuinely forgiving design for a first attempt.
Can this design work with a shorter, more practical nail length? Yes, though scaling the wing pattern down and simplifying the number of branching veins tends to read more clearly on a shorter nail than attempting a full, detailed version at a smaller scale.
What other colors work well instead of pink for the wing base? A sheer white or pale lavender base both work beautifully with the same black vein and white dot technique, giving black butterfly nails a slightly different mood while keeping the core silhouette style intact.
According to OSHA’s overview of chemical hazards in nail products, good ventilation and mindful handling of gel, acrylic paint, and polish removers matter just as much for detailed at-home nail art as they do in a professional salon setting. Our full nail art guide covers more hand-painted techniques like this one, and our black nails guide has more styling ideas if bold black shades are becoming a regular part of your rotation.
According to the American Academy of Dermatology’s guidance on gel manicures, proper curing time and gentle removal matter more for long-term nail health than any specific design choice, which applies just as directly to a detailed accent nail as it does to a plain gel set.