Brown Plaid Almond Nails: How to Recreate This Cozy Coffee-Inspired Look
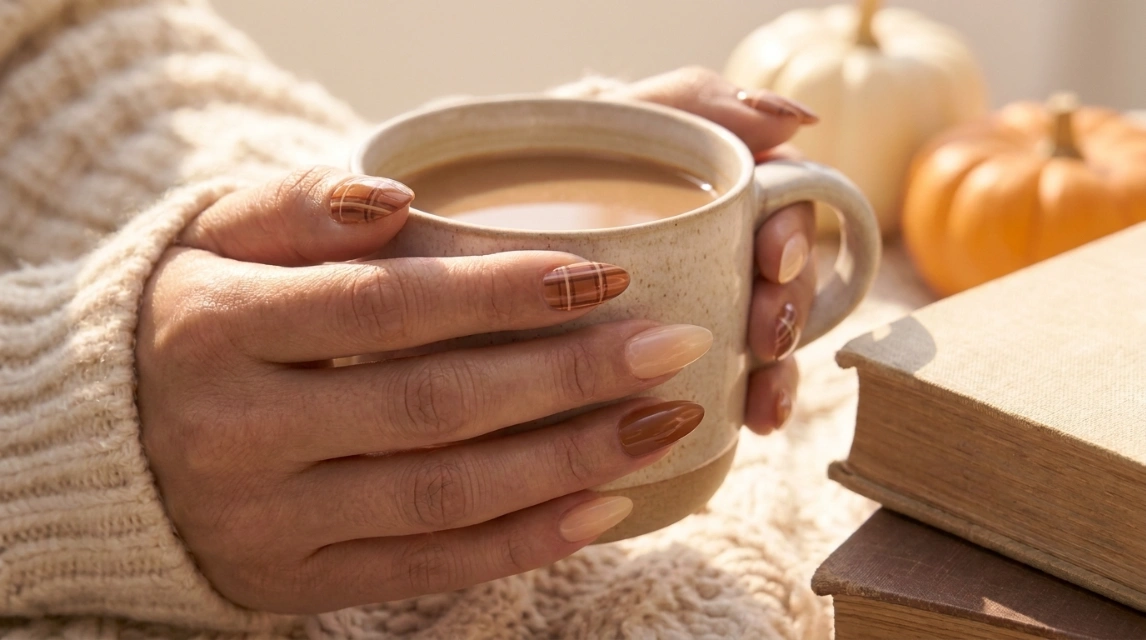
There is something about a warm cinnamon-brown manicure paired with a creamy nude nail that feels instantly cozy. Add a tiny plaid accent, a glossy finish, and an almond shape, and you have a manicure that looks like it belongs beside a warm coffee on a crisp fall morning.
Brown plaid almond nails combine rich terracotta-brown polish with a soft milky nude base and delicate plaid detailing. The finished look is polished without feeling overly complicated, making it a great option if you want something more interesting than a solid brown manicure without covering every nail in elaborate nail art. The best part is that you can recreate the look at home with a few basic nail art tools and a little patience.
What Makes These Brown Plaid Nails So Pretty
The Terracotta-Brown Nails
The brown in this look isn’t a harsh chocolate brown. It’s closer to cinnamon, terracotta, burnt caramel, warm chestnut, or a reddish brown, and that distinction matters more than it sounds like it should. A warm, red-leaning brown is what gives brown plaid almond nails their cozy, coffee-shop quality, while a cooler, gray-based brown reads flatter and less inviting under the same lighting.
The Milky Nude Nails
The lighter nails create contrast and give the manicure room to breathe. Instead of making every nail brown, the milky nude or soft pink shade balances the richness of the terracotta, so the whole set reads as considered rather than heavy.
The Plaid Accent
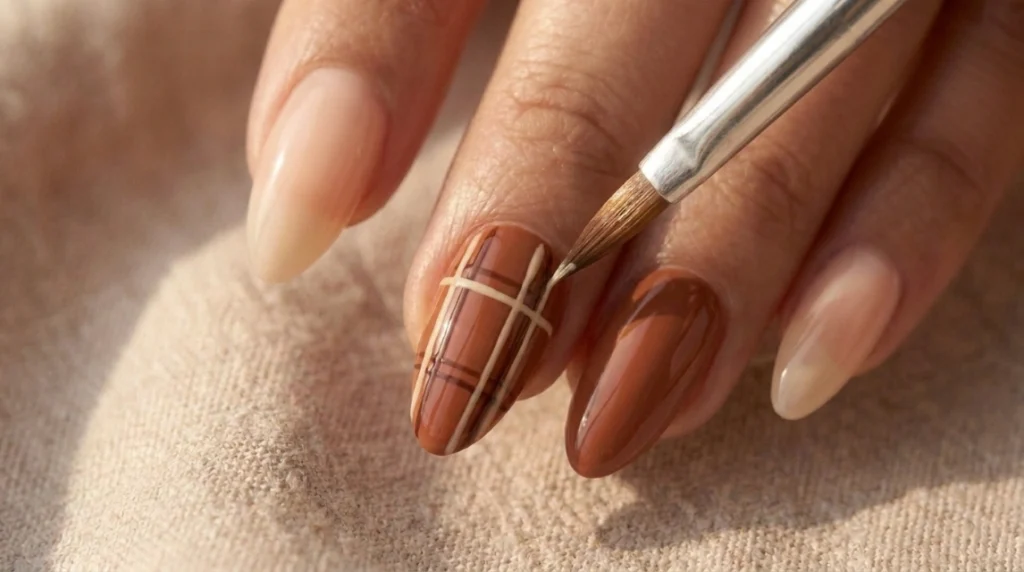
This is the feature that makes the manicure genuinely interesting. The plaid is thin, geometric, minimalist, and reddish brown, placed over a light nude base. You don’t need to cover multiple nails in complicated plaid. One carefully designed accent nail is enough, and current fall nail coverage backs this up directly, several trend pieces on this exact look note that keeping most nails solid and reserving the plaid for just one or two accents is what makes the detailed checks stand out rather than overwhelming the set.
The Almond Shape
The almond shape makes the manicure look elongated and elegant, and it happens to be one of the two most consistently recommended shapes for fall nail art generally, since the softened taper works with both simple solid colors and more detailed pattern work like plaid. This design also translates well to short almond, medium almond, oval, squoval, or extensions, so the shape itself isn’t a barrier if almond specifically isn’t your usual choice.
What You’ll Need for Brown Plaid Almond Nails
Base products
- Nail file
- Nail buffer
- Cuticle pusher
- Nail cleanser or alcohol
- Base coat
- Top coat
Polish
- Warm terracotta or cinnamon brown (think burnt caramel plus cinnamon plus reddish brown)
- Sheer milky pink or nude, for the accent nail’s background
- A darker brown or terracotta nail-art polish for the plaid lines
Tools
- Fine nail-art liner brush
- Dotting tool
- Cleanup brush
- Small palette or a piece of foil for loading your brush
- Nail-art tape, optional
If you don’t own a liner brush, a very fine detail brush can work as a substitute, but avoid trying to draw the plaid with a large polish brush. Thin lines are much easier to control with something built for fine detail work.
How to Create Brown Plaid Almond Nails Step by Step
This is the actual tutorial for brown plaid almond nails, broken into six manageable steps.
Step 1: Prepare Your Nails
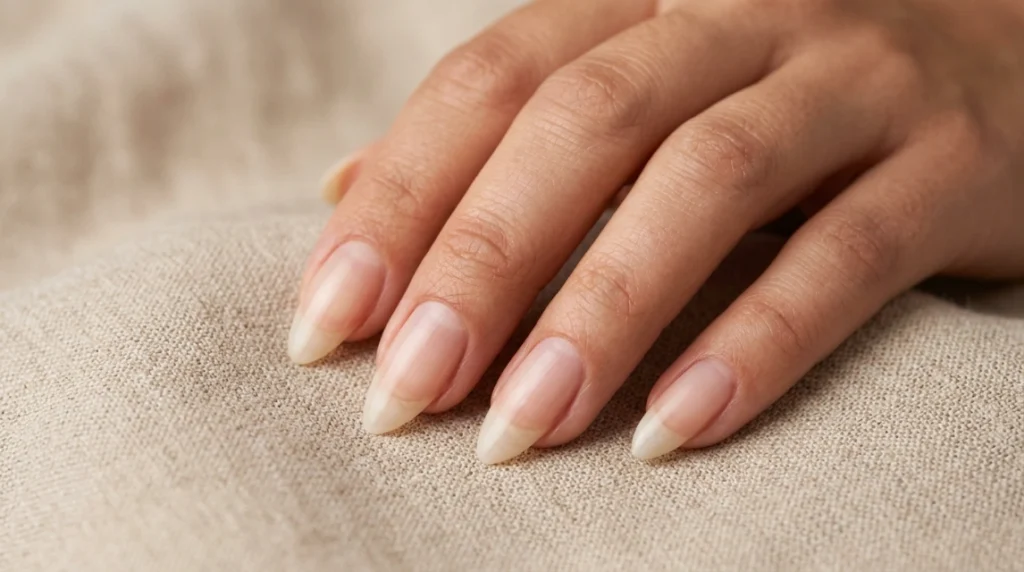
Remove any old polish, wash and dry your hands, then gently push back your cuticles rather than cutting them aggressively. Shape your nails, lightly buff away surface shine only if that’s appropriate for the polish system you’re using, remove any dust, then apply your base coat.
Step 2: Shape Your Nails Into an Almond
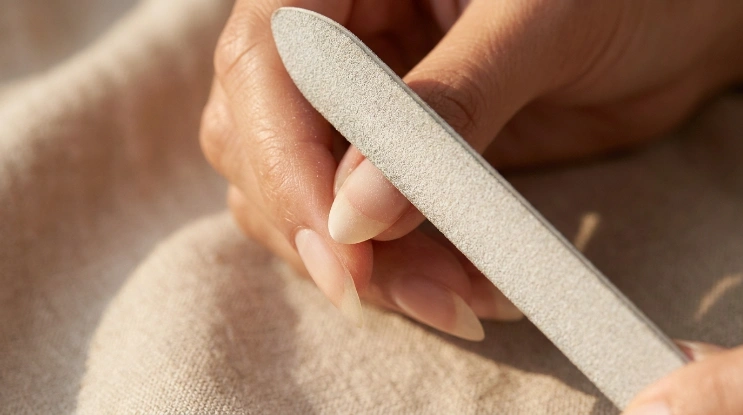
You’re aiming for straight-ish sidewalls that gradually taper toward a softly rounded tip, not a sharp point. If creating a perfect almond shape on natural nails feels difficult at first, start from your existing oval shape and gradually refine the sides rather than filing aggressively from the very beginning.
Step 3: Apply the Base Colors
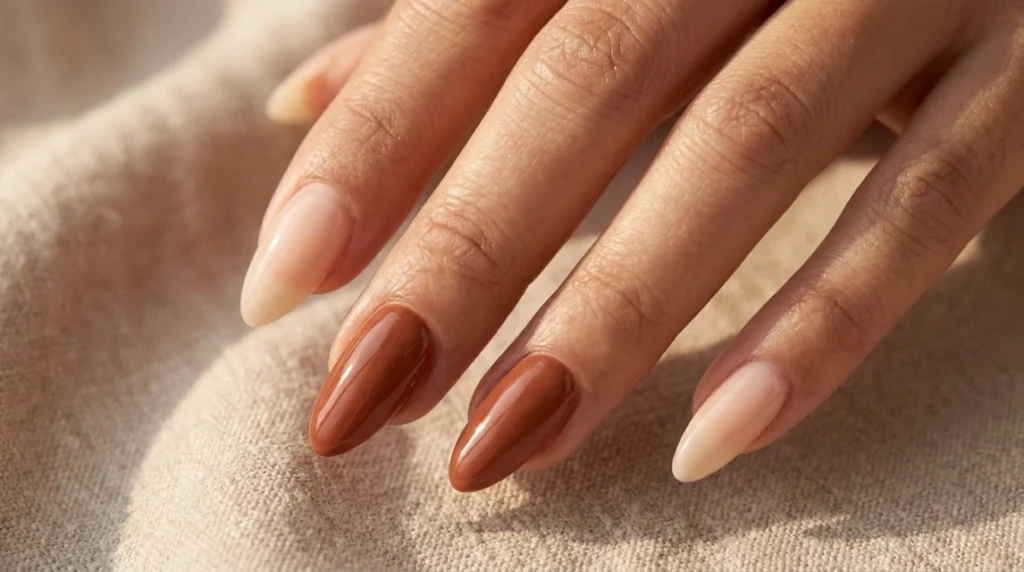
Divide your nails so the design has rhythm rather than repetition. A workable split is terracotta brown on your thumb and pinky, milky nude on your index and ring fingers, and milky nude with the plaid detail on your middle finger. Apply two thin coats of each color rather than one thick one, letting each coat dry fully according to your polish’s instructions before moving to the next.
Step 4: Create the Plaid Accent
This is where the article can actually become useful, since the trick isn’t painting random crossing lines. The plaid needs consistent spacing to read as plaid rather than a messy grid.
First, confirm your base. Apply the milky pink or nude shade to your accent nail and let it dry completely before adding any detail.
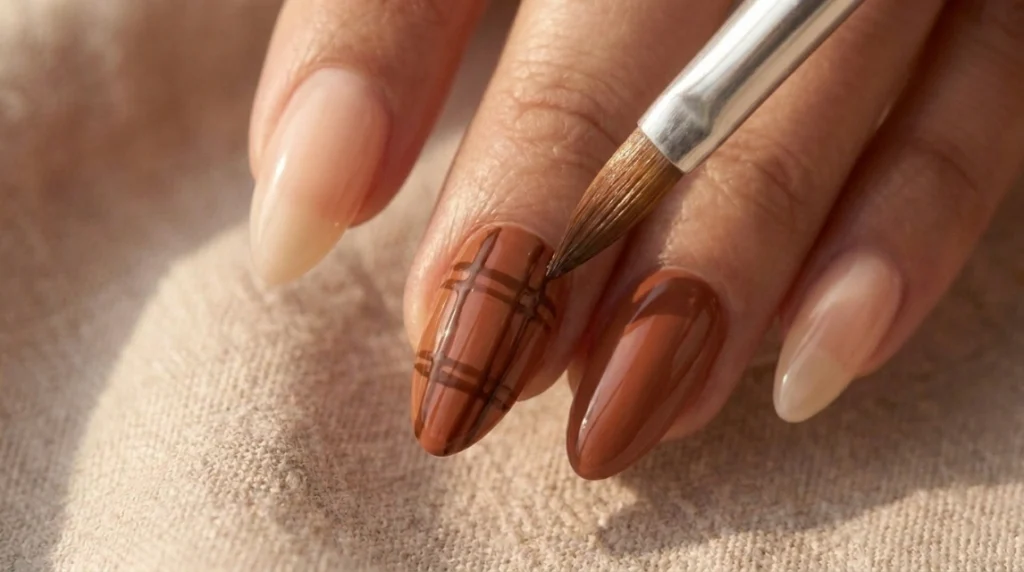
Second, paint the vertical lines. Load your fine liner brush with a small amount of brown polish, start near the cuticle, and pull the brush toward the tip in one controlled movement to create a thin vertical line. Add a second line parallel to the first. Don’t overload the brush, a thin, controlled line depends on using less polish than feels natural at first.
Third, add the horizontal lines. Once your vertical lines are dry enough to work over, paint one horizontal line, then a second parallel to it, keeping the spacing relatively consistent with your vertical lines.
Fourth, add the darker crossing details. This is what makes the plaid look sophisticated rather than like a plain grid. Instead of making every line identical, vary the intersections slightly, a touch darker where two lines cross, small variations in spacing here and there. The result should look like miniature fabric plaid, not a technical drawing.
Beginner hack: don’t try to paint the whole plaid at once. Paint, pause, paint, pause, letting each layer become tacky before crossing it with the next line. This single habit reduces smudging, dragging, and thick, blobby intersections more than any brush technique will on its own. If you want to build confidence first, practicing the plaid pattern on a spare nail-art tip before committing to your actual nail is a genuinely useful warm-up.
Step 5: Clean Around the Cuticle
Use a small cleanup brush dipped in polish remover to correct any polish that strayed around the cuticle, uneven edges, accidental brown marks, or plaid lines that extended past the nail. This is one of those small steps that makes a home manicure look dramatically more professional, and it’s worth doing carefully rather than rushing to the top coat.
Step 6: Apply Glossy Top Coat
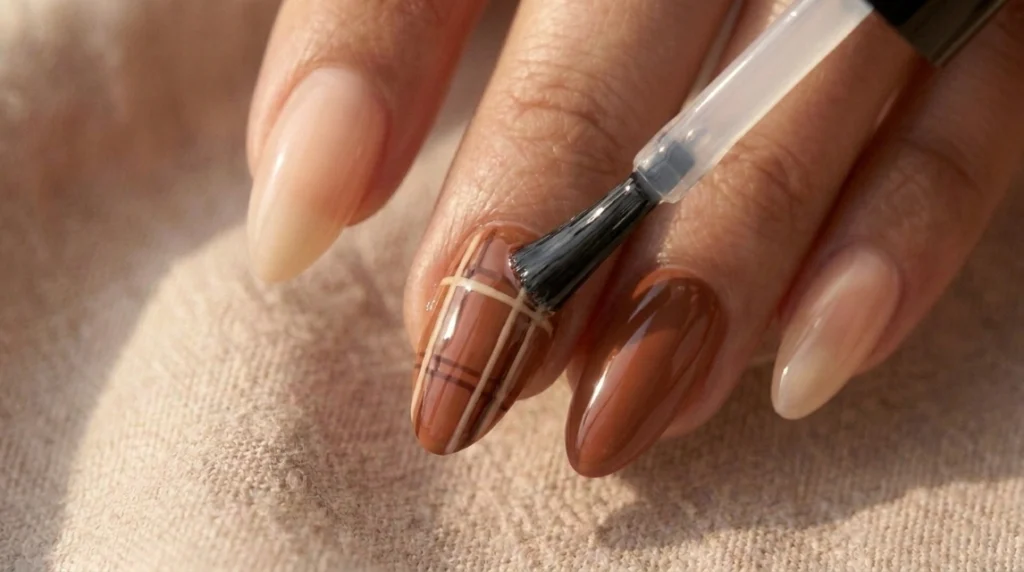
Apply a smooth, even layer of glossy top coat across every nail. Avoid repeatedly brushing back and forth over the plaid nail specifically, since that dragging motion is exactly what smears fine detail work. Instead, float the top coat over the design with light, controlled strokes, then let the manicure cure or dry fully according to your product’s instructions.
How to Make Your Plaid Lines Look Clean
Clean plaid comes down to patience more than raw skill. Working in thin, deliberate layers rather than trying to finish the whole pattern in one pass, letting each layer set before crossing it, and resisting the urge to overload your brush are the three habits that separate crisp plaid from a smudged attempt.
How to Get the Cozy Cinnamon-Coffee Color Palette
The secret to this look isn’t simply “brown polish.” It’s the specific combination working together. Use a warm, reddish brown rather than a cool, gray-based one, since the warmth is what gives the manicure its cinnamon and coffee feeling. Keep your nude shade creamy rather than stark white, a slightly pink or milky nude adds softness that a colder white base doesn’t. Keep the plaid delicate, since thick lines make the whole design look heavier than intended. Use a genuinely glossy top coat, the shine is a real part of what makes the brown look rich rather than flat. And resist the urge to over-decorate, the design works specifically because the plaid functions as an accent rather than covering the entire set.
Brown Plaid Nails for Different Nail Lengths
Short nails: stick to one plaid accent nail, keep the plaid lines smaller and closer together, and consider a shorter almond or oval shape rather than a longer, more dramatic taper.
Medium nails: you have room for two accent nails if you want a bit more presence, slightly larger plaid lines, or a French-tip variation using the same brown and nude palette.
Long nails: this length gives you room to experiment with multiple plaid nails, negative space work, French tips, subtle chrome accents, or a more layered, detailed plaid pattern across a larger nail surface.
7 Ways to Customize This Brown Plaid Manicure
- Brown French Tips. Keep the milky nude base and swap the solid brown nails for cinnamon-toned French tips instead.
- Chocolate Brown Version. Replace the terracotta with a deeper, more dramatic chocolate brown for a moodier fall palette.
- Caramel Version. Use a lighter caramel or cognac shade for a softer, more understated take on the same combination.
- Burgundy Plaid. Keep the nude base but swap the brown plaid lines for burgundy, a popular pairing in current fall trend coverage.
- Mocha Version. Use a coffee-bean brown against a warm beige nude for an even more literal coffee-shop palette.
- Gold Detail. Add one extremely thin gold line running through the plaid for a small, elevated hit of shine.
- Matte Version. Finish the entire set with a matte top coat instead of gloss for a completely different, more understated mood.
The Coffee-Inspired Aesthetic Behind the Look
Part of why this palette works so well together is that it echoes a very specific, familiar set of textures and tones, espresso, cinnamon, caramel, oat milk, warm coffee-shop interiors, autumn sweaters, and leather accessories. It’s worth calling this a coffee-inspired aesthetic rather than presenting it as some officially named trend, since the specific “coffee nails” label isn’t a formally established category the way something like the milky French manicure is. What is well documented is that warm brown tones and plaid motifs are both independently confirmed as major directions in current fall nail coverage, and this look simply brings the two together.
Common Brown Plaid Nail Art Mistakes
Lines that are too thick. This almost always comes down to overloading the brush. Use less polish and a genuinely fine liner brush rather than a standard polish brush.
Lines that bleed together. Let your first set of lines dry before adding the crossing set. Working too quickly is the most common cause of blurred, merged plaid lines.
Plaid that isn’t straight. Rest your painting hand on a stable surface and move your finger into position rather than trying to control the whole motion from your wrist.
Brown polish getting everywhere. Work with a small amount of polish on your brush at a time, and keep a cleanup brush within reach the entire time you’re working.
Top coat smearing the plaid. Give your linework more drying time before sealing, and apply the top coat in light, floating strokes rather than pressing and dragging the brush back and forth.
An uneven almond shape. Check your shape from multiple angles rather than only looking straight down at the nail, since unevenness is often much more obvious from the side.
How Long Does This Manicure Actually Take?
For a beginner, expect roughly forty-five to seventy-five minutes, depending on whether you’re working with regular polish, gel, extensions, or natural nails, and how much time you spend on the plaid detail specifically. Experienced nail artists typically complete the same design considerably faster, but there’s no need to rush your first attempt.
How to Make Your Brown Plaid Manicure Last
Avoid using your nails as tools for opening or prying things, wear gloves for extended household cleaning, and resist picking at any polish that starts to lift at the edges. Reapply a compatible top coat partway through your wear cycle if your polish allows for it, and keep your nails and the surrounding skin moisturized throughout. If you’re working with gel specifically, follow the proper soak-off removal process rather than peeling or forcing it off, since that single habit is what causes most of the long-term thinning people associate with gel wear.
Frequently Asked Questions About Brown Plaid Almond Nails
What colors go with brown plaid nails? Brown plaid pairs beautifully with milky nude, cream, beige, caramel, burgundy, dusty pink, and warm white, all of which echo the same cozy, warm-toned palette.
Are brown plaid nails good for fall? Yes. Warm brown, cinnamon, caramel, and plaid motifs are all independently confirmed as major directions in current fall nail trend coverage, and together they create a naturally cohesive autumn-inspired look.
Can I do plaid nail art without a liner brush? Yes, although a fine liner brush makes thin, controlled lines considerably easier to achieve than a standard detail brush.
Are plaid nails difficult for beginners? The plaid accent takes some patience, but limiting the pattern to just one accent nail makes the whole design far more manageable for a first attempt.
What nail shape works best with plaid? Almond, oval, and squoval shapes all work well, with almond specifically creating the elongated look associated with this style. Coffin also pairs well with plaid accent art if you want something a bit bolder.
Can I recreate this design on short nails? Yes. Simply scale the plaid lines down and keep the pattern to one accent nail rather than attempting a larger, more detailed version.
What brown should I use for this look? Choose a warm cinnamon, terracotta, caramel-brown, or reddish-brown shade rather than a cool, gray-based chocolate brown, since the warmth is central to the whole aesthetic.
Final Thoughts
Brown plaid nails don’t need complicated nail art to make an impression. The combination of warm cinnamon-brown polish, soft milky nude, delicate plaid lines, and a glossy almond shape creates a manicure that feels polished while still being cozy and wearable.

If you’re new to nail art, start with just one plaid accent nail. Once you’re comfortable controlling the liner brush, you can experiment with deeper chocolate browns, caramel tones, burgundy plaid, French tips, or even subtle metallic details. The result is a manicure that works especially well when you want your nails to feel warm, seasonal, and a little more special than a single-color manicure.
Our best nail shape for your fingers guide is worth a look before you start filing, since getting the almond taper right makes a real difference in how this whole design reads. For more hand-painted techniques once you’ve got the plaid down, our Nail Art category covers several other detailed designs worth trying, and our Fall Nails category has more seasonal color and pattern ideas if this cozy palette has you in a full autumn styling mood.
According to the American Academy of Dermatology’s healthy nail tips, gently pushing back cuticles rather than cutting them is one of the core habits for long-term nail health, which is exactly the approach this tutorial recommends during nail prep. Mayo Clinic’s general nail care guidance similarly cautions against excessive buffing, worth keeping in mind before you start shaping and prepping for a detailed design like this one.