Easy Halloween Character Nails: 5 Spooky Designs You Can Actually Do at Home
Want Halloween nails that look like tiny characters without spending an hour painting every nail? You can get a full set of five different Halloween characters, a ghost, a pumpkin, a black cat, a little devil, and a mini skull, using nothing but simple shapes, dots, and short lines. None of these designs need advanced painting skill. A dotting tool or even a toothpick can stand in for a nail art brush, and the whole set works with regular polish or gel.
This is not another “30 Halloween nail ideas” scroll. It is one hand, five characters, and a real step-by-step sequence you can actually follow. If you want the full spectrum of spookier and more graphic looks first, our Halloween nail art roundup is the place to browse before you commit to a design.
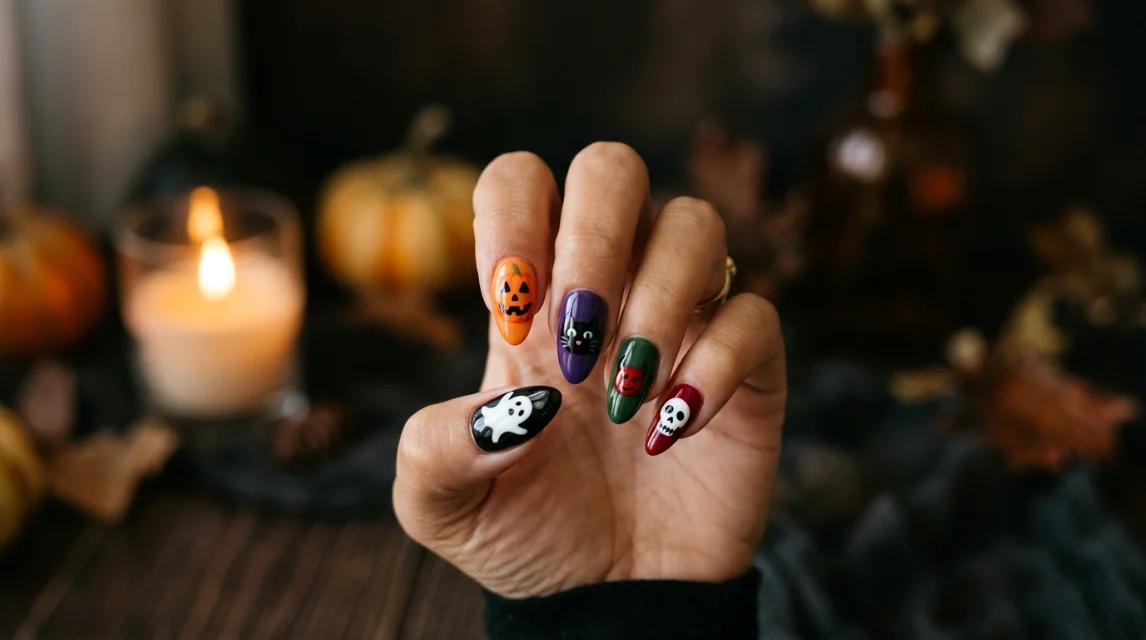
The finished Halloween character nail set
Here is what you are working toward: five nails, five characters, one cohesive Halloween hand. Thumb gets a black cat, index gets a pumpkin, middle gets a ghost, ring gets a little devil, and pinky gets a mini skull. Each character is built from two or three simple shapes rather than a detailed illustration, so the glossy, dramatic finish comes from the color and shine, not from painting skill, the same way our glossy nails guide breaks down high-shine finishes for other designs.
You can copy the whole set, or pull just one or two characters if you want something more subtle.
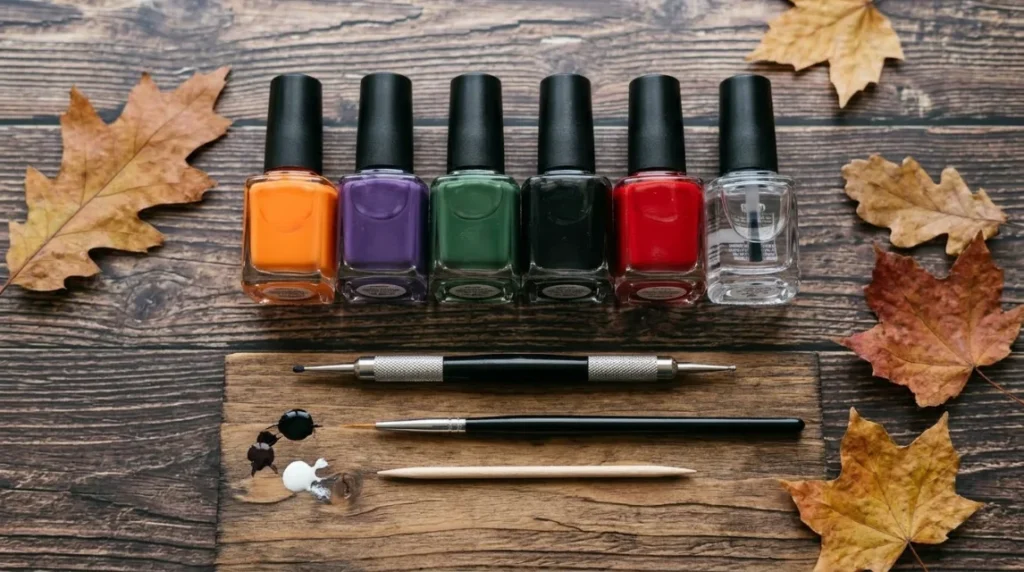
What you need
- Base coat
- Black polish
- White polish
- Orange polish
- Purple polish
- Green polish
- Red polish
- Glossy top coat
- A thin nail art brush
- A dotting tool
- A small detail brush
No nail art brush at home? A dotting tool and a toothpick can handle almost every facial detail in this tutorial, so this set is genuinely achievable even with a bare-bones supply kit. If you are still stocking up, our DIY nail tools for beginners guide covers what is actually worth buying first.
Before you start
Shape and file your nails, push back the cuticles gently, and wipe away any surface oils before applying a base coat. Let the base coat dry or cure fully. The character artwork only goes on once the background colors underneath are completely dry, since wet polish under wet polish is how designs smear. For a refresher on shaping, our nail shapes guide covers which shape holds up best for detailed nail art like this.
Step 1: Paint the Halloween base colors
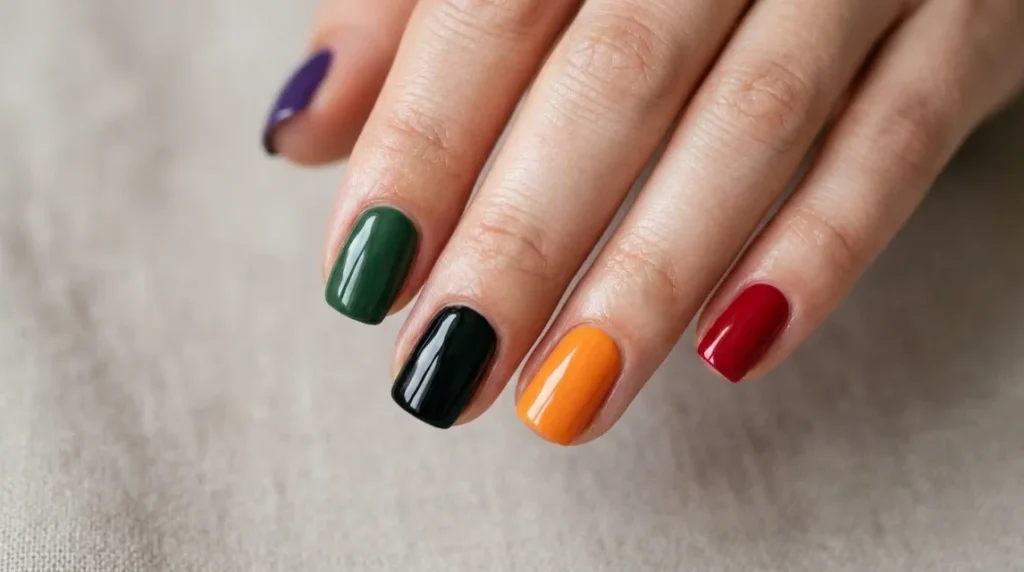
Start by painting each nail its background color. A workable combination is black for the cat nail, deep orange for the pumpkin nail, black or deep purple for the ghost nail, deep red for the devil nail, and dark green or black for the skull nail. Keep every base color dark and glossy so the lighter character details pop against it later.
Step 2: Paint the ghost
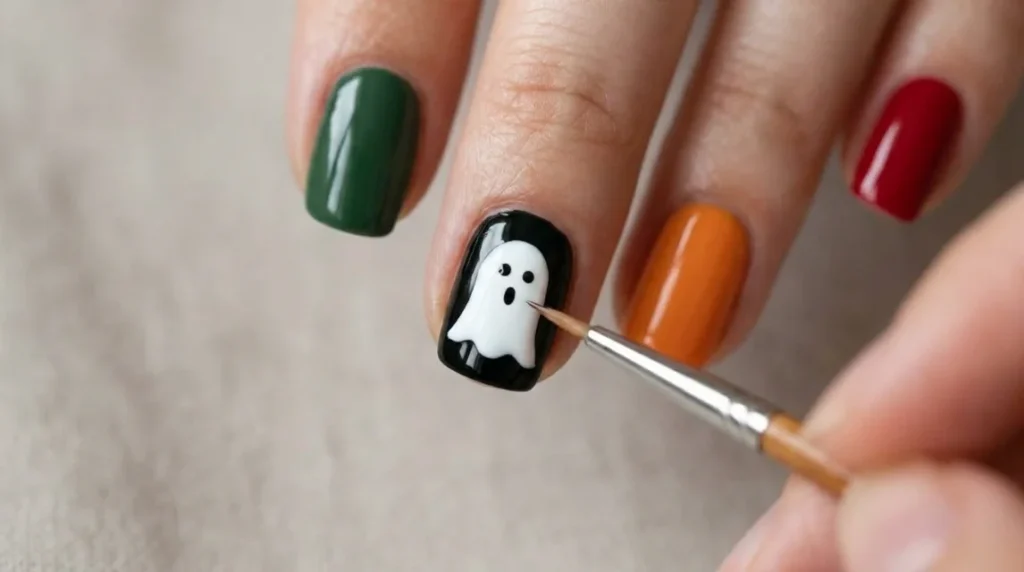
Start with the ghost, since it is the easiest character and gives you an early win before the trickier designs. Place a small, rounded white shape near the center of the nail and let it taper slightly toward the tip. Add two tiny black dots for eyes and a small oval for the mouth. Two short curved lines can stand in for little arms if you want the classic waving-ghost look. The whole thing comes down to a white blob, two dots, and a tiny mouth.
Step 3: Paint the pumpkin
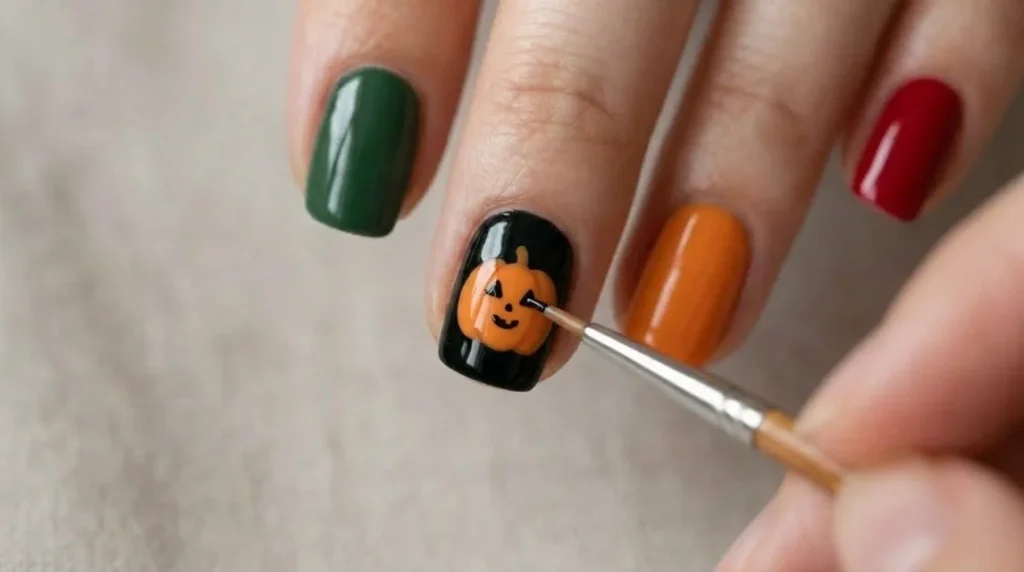
Create a small orange pumpkin shape, then add two or three thin, darker orange curved lines running down it to suggest the ridges. A tiny green stem goes on top, followed by two small triangular eyes and a simple smiling mouth. The face does not need to be perfectly symmetrical. Keeping the pumpkin on the smaller side actually makes the nail look more editorial and less like a children’s craft.
Step 4: Paint the black cat
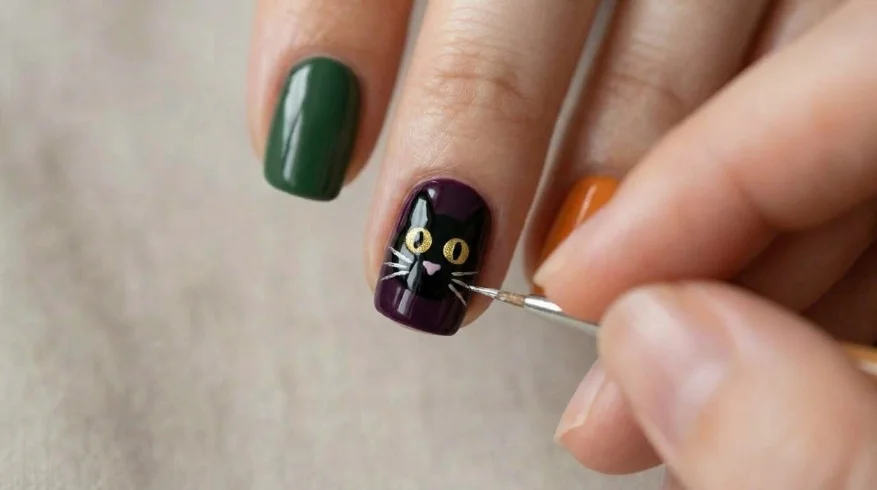
This is where the set starts to look more sophisticated, even though the technique stays simple. Paint two tiny pointed ears at the top of the nail, then connect them with a rounded black head shape. Add two bright eyes, gold or yellow works especially well against a purple or burgundy base, and finish with three short whisker lines. You are not painting a whole cat, just a face.
Step 5: Paint the little devil
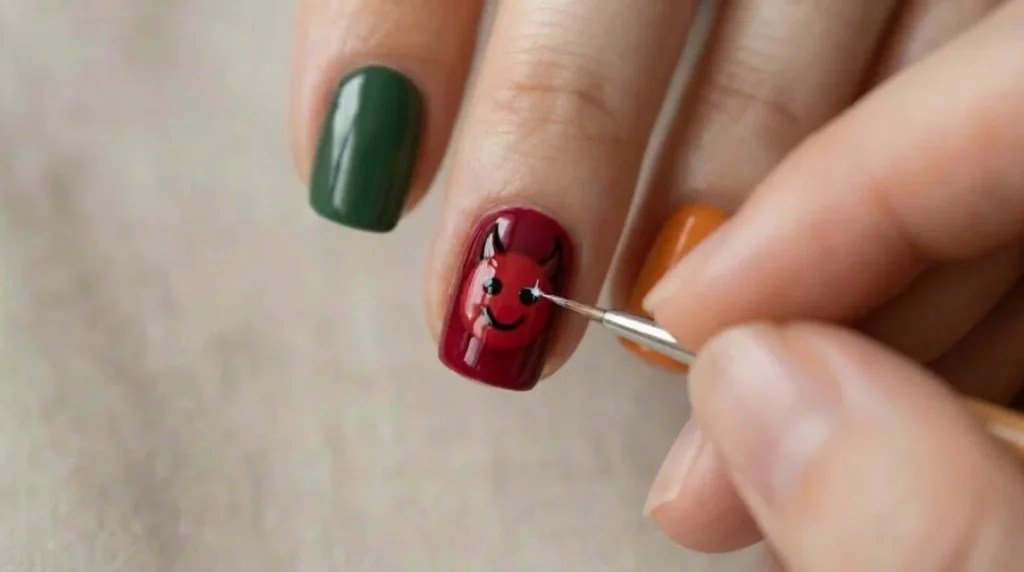
Paint a small red oval for the face, then add two pointed horns at the top. Two black dot eyes and a small mischievous smile finish the expression, and a single tiny white highlight on the horn or cheek adds a bit of dimension. Just the face is enough. You do not need to paint a body.
Step 6: Paint the mini skull
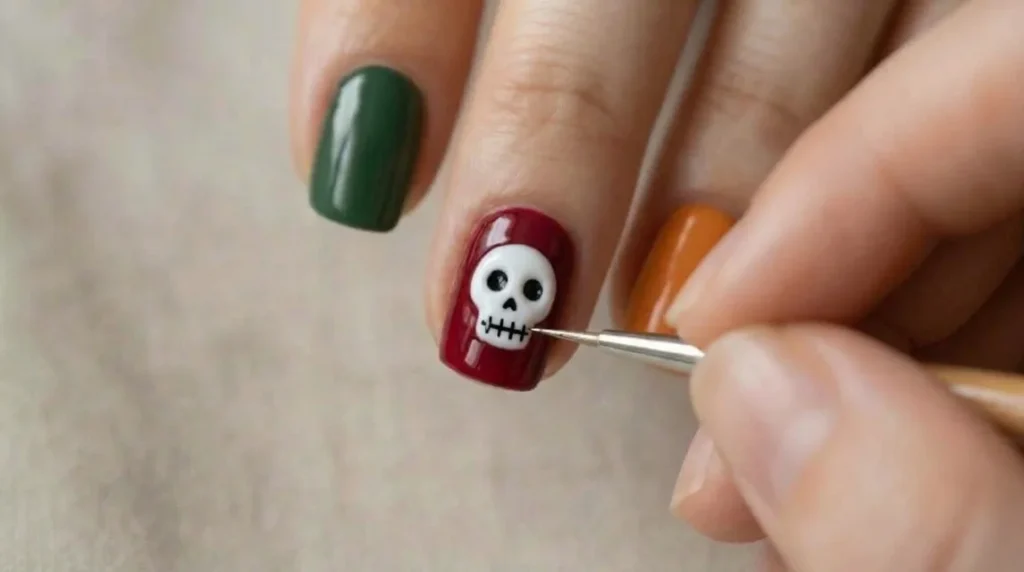
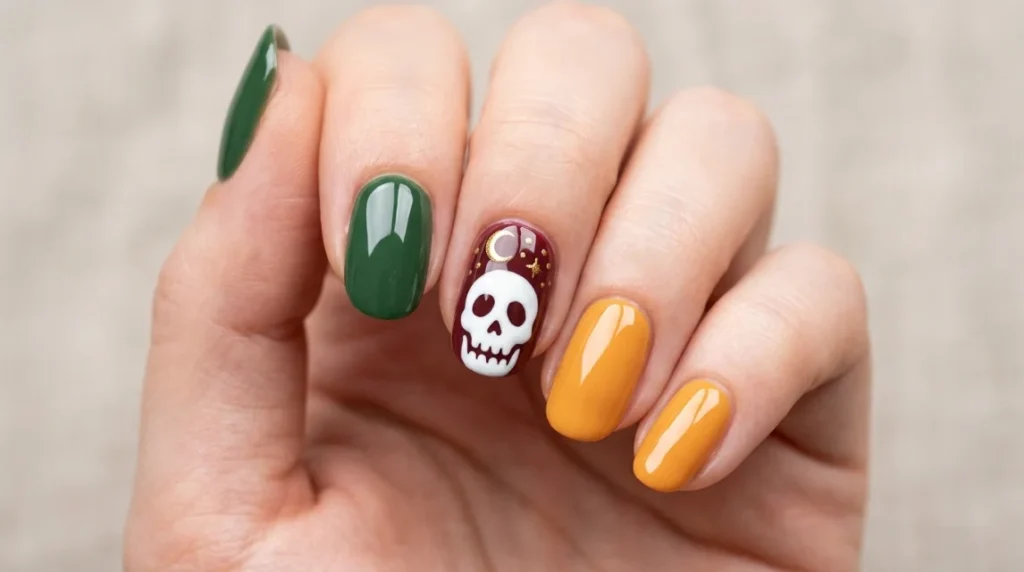
Save the skull for last since it takes slightly more detail than the others. Paint a small white skull shape, add two black eye sockets, a tiny triangular nose, and two or three short horizontal lines for teeth. A small purple or silver accent near the top is optional. Keep the skull small. A compact skull floating on a dark glossy background reads as far more polished than an oversized one.
Step 7: Add a few tiny details
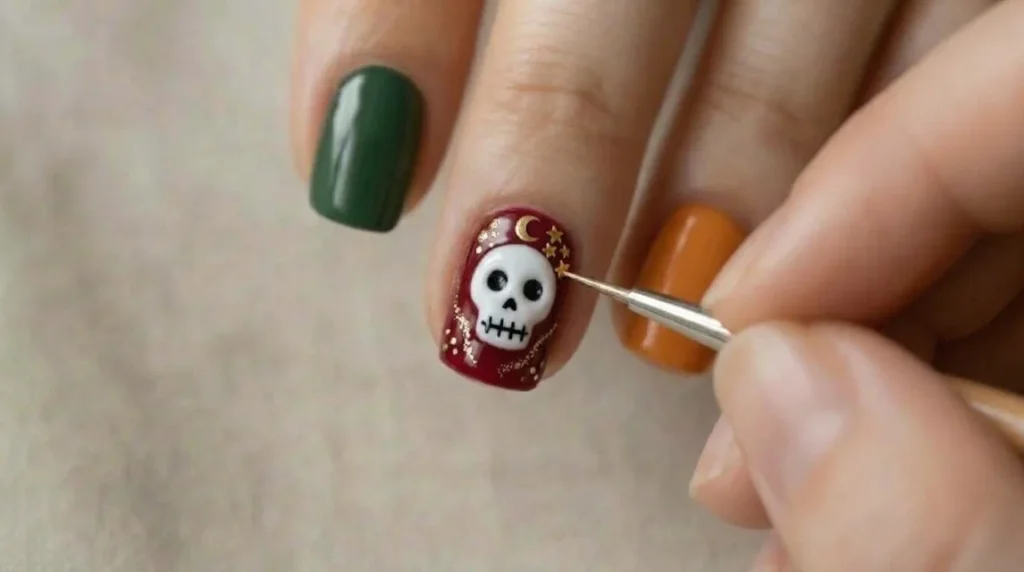
This is the step that makes the set look more expensive without adding real difficulty. Pick a few small extras, tiny stars, a miniature dot cluster, a small crescent moon, a touch of metallic accent, or a little micro glitter around one or two characters. Do not decorate every empty space on the nail. The characters should stay the visual focus, not the background filler.
Step 8: Seal everything with top coat
Finish with a glossy top coat over every nail. Float the brush over the artwork rather than pressing into it, since dragging a loaded brush across tiny details can smear them. Cap the free edge of each nail, and cure under a lamp if you are working in gel. This step is also what gives the finished set that wet, reflective look that makes the characters read as dramatic rather than flat, the same finishing move covered in our chrome nails at home tutorial.
Make it your own skill level
No nail art brush? A dotting tool works well for eyes, a toothpick can handle fine lines, the tip of a bobby pin can stand in for tiny dots, and a small detail brush covers most facial features. None of these designs require a full nail art brush collection.
Don’t want all five characters? Mix and match based on how much time or patience you have.
- Minimal version: ghost and pumpkin only
- Cute version: ghost, black cat, and pumpkin
- Spooky version: skull, devil, and ghost
- Full Halloween set: all five characters
The 3-detail rule for neater characters
If you take away one technique from this tutorial, make it this: every character here is built from a shape, a set of eyes, and one recognizable extra detail. Nothing more.
- Pumpkin: orange shape, eyes, stem
- Cat: ears, eyes, whiskers
- Devil: horns, eyes, smile
- Skull: eye sockets, nose, teeth
- Ghost: white body, eyes, mouth
Once you see character nail art broken down this way, you can apply the same three-detail approach to almost any tiny design, not just these five.
Regular polish vs. gel for this look
| Regular polish | Gel polish | |
|---|---|---|
| Best for | Beginners, no lamp needed | Sharper, more precise artwork |
| Drying/curing | Longer air-dry time | Cures quickly under a lamp |
| Wear | Good for a short-term Halloween look | Longer-lasting, needs proper soak-off removal |
| Layering | Can get streaky if rushed | Easier to build fine detail in thin layers |
Neither option is wrong here. Regular polish is the lower-commitment choice if you only want this look for one night, while gel holds up better if you want your character nails to last through a week of Halloween parties. NAILPRO notes that a true black and a crisp white are the two shades every Halloween nail kit should have on hand, which lines up with the base colors used throughout this tutorial.
Easy variations to try
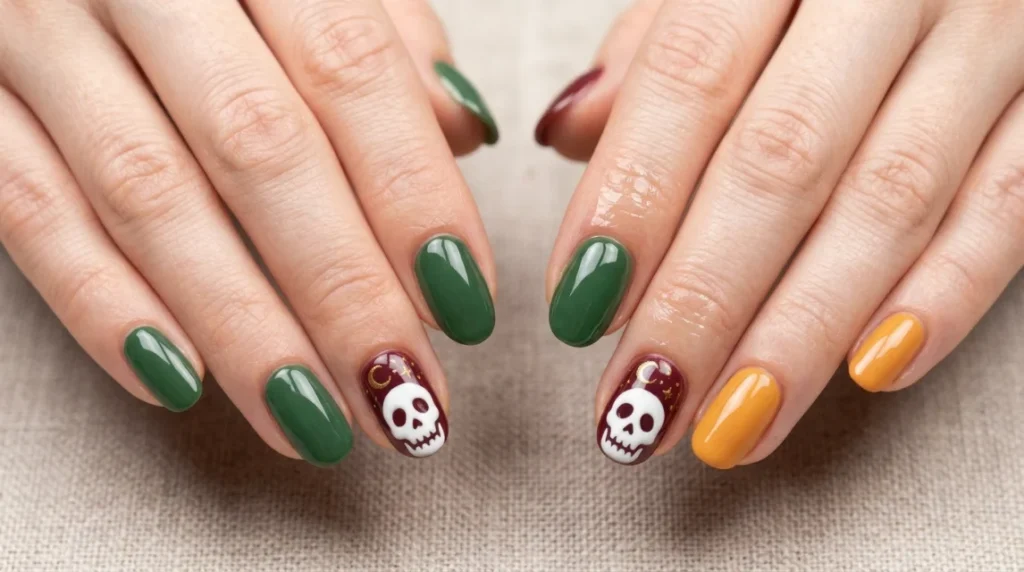
- Purple Halloween characters: purple, black, and silver instead of the original palette
- Red and black Halloween nails: a more dramatic, vampy take on the same five characters
- Cute Halloween characters: rounder faces and softer pastel-leaning colors
- Glow-in-the-dark characters: swap in glow polish for the eyes or small details
- Chrome Halloween characters: add a chrome accent nail to the set, similar to the technique in our chrome nails at home guide
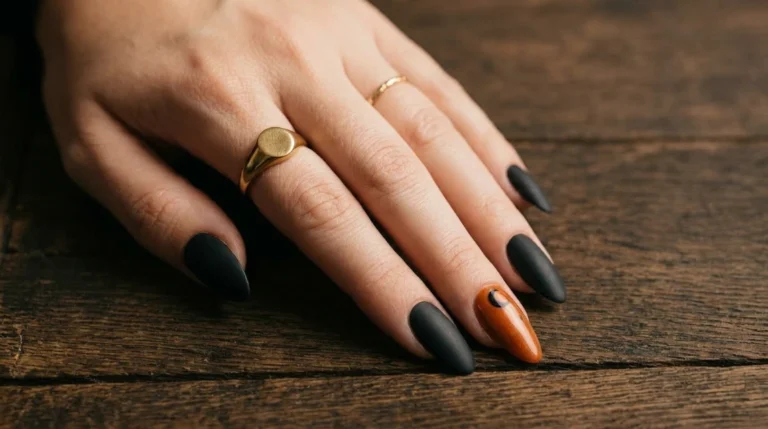
- Matte Halloween characters: matte base colors with a glossy top coat only on the character faces
For more seasonal color pairings beyond this palette, our Halloween nail art hub has additional combinations worth browsing.
Frequently asked questions
What are the easiest Halloween character nails for beginners? The ghost and the pumpkin are the easiest starting points. Both come down to one main shape plus two or three small details, so they are the best characters to practice first.
How do you paint tiny Halloween characters on nails? Break each character into its basic shape first, then add the eyes, then add one more recognizable detail like horns, whiskers, or a stem. Building in that order keeps small designs from turning into a smudged mess.
Can I create Halloween character nails without a nail art brush? Yes. A dotting tool, a toothpick, and even the flat end of a bobby pin can cover most of the fine details in this tutorial.
What colors are best for Halloween character nails? Black, orange, white, purple, deep red, and green cover all five characters in this set and give you enough contrast for the faces to read clearly, even at a small size.
Can I do Halloween character nails with regular polish? Yes. Regular polish works for every step here. Just expect a shorter wear time than you would get with gel, and give each layer extra time to dry before adding detail on top.
How do you keep small nail art details from smudging? Let each base color fully dry or cure before starting the character artwork, and float your top coat over the design instead of pressing the brush into it.
What Halloween nail designs are easiest to recreate at home? Designs built from simple shapes, like this character set, are far easier to recreate than photorealistic or airbrushed Halloween art. Simplified shapes are also what actually reads clearly on camera and at Pinterest thumbnail size.